
部落格

客製化自己的部落格網站模板
翻譯自Adapting Your Blog Templates
依據專案的編輯偏好,從你下載的 Clean Blog bootstrap-theme 中,打開 index.html,並且複製 HTML 做為單一部落格頁面的呈現。
<div class="post-preview">
  <a href="post.html">
    <h2 class="post-title">
      Man must explore, and this is exploration at its greatest
    </h2>
    <h3 class="post-subtitle">
      Problems look mighty small from 150 miles up
    </h3>
  </a>
  <p class="post-meta">Posted by
    <a href="#">Start Bootstrap</a>
      on September 24, 2018</p>
</div>
<hr>
到路徑 templates/aldryn_newsblog/includes/ 底下,找到 article.html 的檔案,並且將以下兩個標籤中間的程式碼用剛剛複製的 HTML 程式碼替換掉。
從
{% if not article.published %} unpublished{% endif %}">
到
{% if detail_view %}
有了我們剛剛複製的主題樣板,你可以開瀏覽器看一下你的部落格頁面,你會發現裡面的內容已經被剛剛你複製的 html 替換上去了。
現在我們把正確的標籤在模板中,這樣我們的頁面就是動態呈現的。首先,我們需要標題。
將以下內容:
<h2 class="post-title">
  Man must explore, and this is exploration at its greatest
</h2>
<h3 class="post-subtitle">
  Problems look mighty small from 150 miles up
</h3>
用以下程式碼取代:
<h2 class="post-title">
    {% render_model article "title" %}
</h2>
{% if article.lead_in %}
<h3 class="post-subtitle">
    {% if not detail_view %}
        {% render_model article "lead_in" "" "" "truncatewords:'20'" %}
    {% else %}
        {% render_model article "lead_in" %}
    {% endif %}
</h3>
{% endif %}
Lead 介紹
每篇文章都可以有 lead 的文字 (可以想成部落格貼文的介紹) ,並且會在文章標題之後,被呈現出來。雙點擊部落格貼文的標題,畫面滑到下面後在進階設置的區塊,就可以在 lead 的文字區塊編輯內容。
Django Filter
用來呈現 lead 較精簡的版本,提供在詳細內容外的 20 字說明 (例如用在文章列表的呈現),我們會在 {% if not detail_view %} 的條件式裡加上 truncatewords: '20'。可以隨意地更改成任意數字。一個 Django 的模型對於你的資料是單一且明確的資訊來源。如此一來,我們的部落格貼文包含很多特定的值以及儲存資料的行為。Django CMS 提供了 "render_model" 的模板標籤,只要雙點擊就可以讓你在前端的應用中直接的編輯特定的值。
更詳細的模板標籤說明,在此文件中
接下來我們要更改那些寫死的文章連結 url,耿成模板的標籤,透過變數可以顯示正確的部落格文章資訊。
把以下程式碼:
<div class="post-preview">
    <a href="post.html">
換成
<div class="post-preview">
    <a href="{% namespace_url 'article-detail' article.slug namespace=namespace default='' %}">
Django URLs
{% namespace_url 'article-detail' article.slug namespace=namespace default='' %} 定義了連結到每一篇部落格文章頁面的 URL。 Namespace 允許在一個網站裡對一個應用程式更多的用法。如果你只想使用這個標籤一次,它會自動地完成他的建立設定。所以在此次的教學中,所有設定基本已經都完成了。
更多 Namespace 的詳細說明
為了要讓 meta 的資訊可以動態呈現,將以下程式碼:
<p class="post-meta">Posted by <a href="#">Start Bootstrap</a> on September 24, 2018</p>
改成
<p class="post-meta">Posted by
    {% include "aldryn_newsblog/includes/author.html" with author=article.author %}
    on {{ article.publishing_date|date }}
</p>
如果你在模板中所有的標籤都設置正確,你的樣板應該長這樣
{% load i18n staticfiles thumbnail cms_tags apphooks_config_tags %}

<article class="article
    {% if article.is_featured %} featured{% endif %}
    {% if not article.published %} unpublished{% endif %}">

    <div class="post-preview">
      <a href="{% namespace_url 'article-detail' article.slug namespace=namespace default='' %}">
        <h2 class="post-title">
            {% render_model article "title" %}
        </h2>
        {% if article.lead_in %}
        <h3 class="post-subtitle">
            {% if not detail_view %}
                {% render_model article "lead_in" "" "" "truncatewords:'20'|striptags" %}
            {% else %}
                {% render_model article "lead_in" %}
            {% endif %}
        </h3>
        {% endif %}
      </a>
      <p class="post-meta">Posted by
        {% include "aldryn_newsblog/includes/author.html" with author=article.author %}
        on {{ article.publishing_date|date }}
      </p>
    </div>
    <hr>

    {% if detail_view %}
        {% render_placeholder article.content language placeholder_language %}
    {% endif %}
</article>
我們需要對 author.html 做一些調整,檔案就在目錄 templates/aldryn_newsblog/includes/ 底下。
將以下程式碼:
{% load i18n staticfiles thumbnail apphooks_config_tags %}

{% if author %}
    <p>
        <a href="{% namespace_url "article-list-by-author" author.slug namespace=namespace default='' %}">
            {% if author.visual %}
                {% thumbnail author.visual "50x50" crop upscale subject_location=author.visual.subject_location as author_image %}
                <img src="{{ author_image.url }}" width="50" height="50" alt="{{ author.name }}">
            {% endif %}
            {{ author.name }}
        </a>
    </p>
    {% if author.function %}<p>{{ author.function }}</p>{% endif %}
    {% if author.article_count %}<p>{{ author.article_count }}</p>{% endif %}
{% endif %}
改為
{% load i18n staticfiles thumbnail apphooks_config_tags %}

{% if author %}
    <a href="{% namespace_url 'article-list-by-author' author.slug namespace=namespace default='' %}">
        {{ author.name }}
    </a>
{% endif %}
你可以用瀏覽器檢查一下你的網業是不是有正確的運作。
Pagination 分頁
我們下一步就是修改分頁的部分。
打開在 templates/aldryn_newsblog/includes/ 底下 pagination.html 的檔案,在靠上方的位置找到
{% load i18n %}

{% if is_paginated %}
    <ul>
把 ul 用以下程式碼代替:
{% load i18n %}

{% if is_paginated %}
    <ul class="pagination">
接下來對每一個 li 的 HTML 元素,然後加上分頁的 class: page-item 。
把 page-link 的 class 加到每個 li 或 span 的元素中
現在可能看起來什麼都沒有,是因為目前你只有一頁的資料,但當你新增更多篇文章,超過五篇文章的時候,分頁就會看起來像這樣:

Detail View 每一篇文章的詳細資料
現在就將模板實際應用到你的部落格文章中,也就是 detail_view
點選其中一篇文章作為檢視接下來我們所做的調整。然後把 article_detail.html 放在這個路徑底下 templates/aldryn_newsblog/ ,並且打開檔案。
因為 Detail View 需要跟所有文章清單的風格一致 (也就是剛剛我們調整過的 article.html) ,剩下還要調整的就是底部的頁面瀏覽。
因此,請再重複在分頁時一樣的過程,最後的結過就會如下方呈現:
<ul class="pagination">
    {% if prev_article %}
        <li class="page-item"><a class="page-link" href="{{ prev_article.get_absolute_url }}">{% trans "Previous Article" %}</a></li>
    {% endif %}
    <li class="page-item"><a class="page-link" href="{% namespace_url "article-list" %}">{% trans "Back to Overview" %}</a></li>
    {% if next_article %}
        <li class="page-item"><a class="page-link" href="{{ next_article.get_absolute_url }}">{% trans "Next Article" %}</a></li>
    {% endif %}
</ul>
新增文章內容
至其中一個你建立過的文章內頁,頁面應該要游標提及 lead 的內容構成。
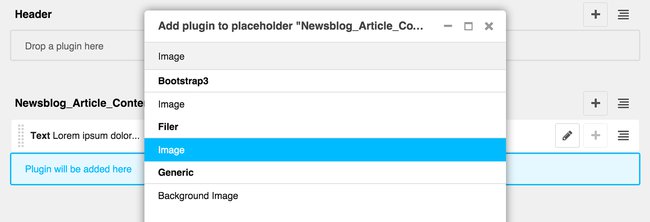
為了要加上文章實際的內容,我們要轉成編輯模式 點擊上方選單的編輯按鈕),然後再到 Structure Mode 的清單中。

加一個圖片的插件到 Content 的部分中,上傳 post-sample-image.jpg 放在 static/img 的資料夾中。(你不需要更改任何設定),並且按下保存鍵以確定編輯。
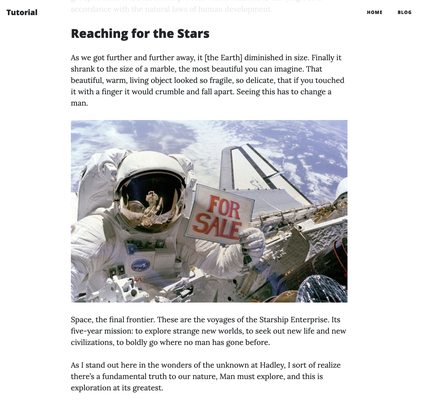
從 Structure Mode 改為 Content Mode ,你就會看到剛才新增的文章內容了。
相信你已經完成了很不錯的部落格網站,有你的網站名稱、你選定的模板風格以及首頁
點擊立即下載此篇文章 PDF
稍後下載閱讀,或與好友分享
留言
teemiaFaf@mailsphere.xyz
Immune cells <a href=https://propecia2buy.top/>buy propecia</a>