Blog
Set Dynamic Header
Translated from: Django cms 教程十一:设置头部动态效果
原载:蜗牛博客
网址:http://www.snailtoday.com
尊重版权,转载时务必以链接形式注明作者和原始出处及本声明。
There are speacial effects on the header background image, In the demonstration of the template Clean Blog we've downloaded .
See the navigation bar and click on different buttons, you'll find out that the header shows different background images.
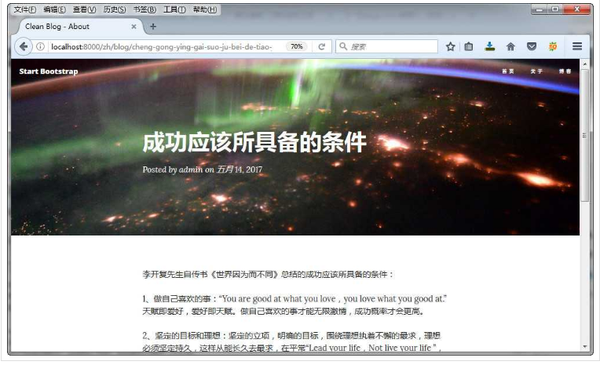
Also, on the Sample Post page, the title was shown on the image, as the following picture:
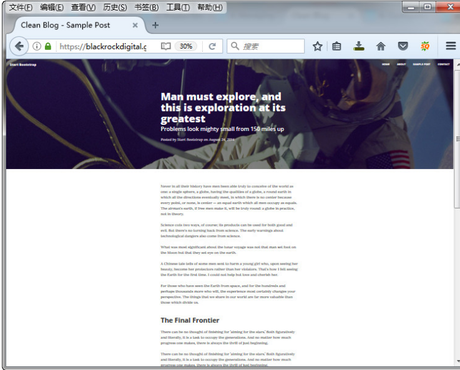
Let's see how to do this.
1.Modify base.html
Find the following code in /templates/base.html:
{% placeholder header or %}
<!-- Set your background image for this header on the line below. -->

<header class="intro-header" style="background-image: url({% static 'img/about-bg.jpg' %})">

<div class="container">

<div class="row">

<div class="col-lg-8 col-lg-offset-2 col-md-10 col-md-offset-1">

<div class="page-heading">

<h1>{% page_attribute "page_title" %}</h1>

                </div>

            </div>

        </div>

    </div>

</header>

{% endplaceholder %}
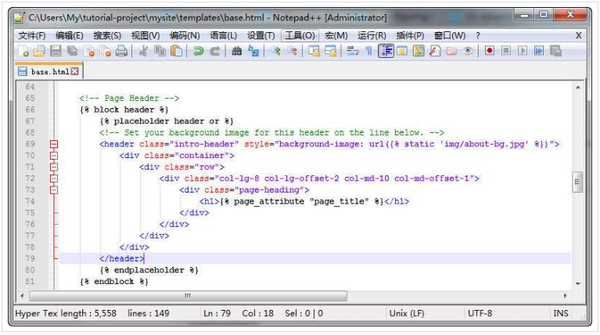
Insert {% block header %} above the code and {% endblock %} at the very end of the code.
The result should be:
2.Modify article_detail.html
Open article_detail.html inside /templates/aldryn_newsblog/.
Notice:
The path depends on how you set your Clean Blog template.
Take Anaconda for example, the path will be: C:UsersMyAnaconda2Libsite-packagesaldryn_newsblogtemplatesaldryn_newsblog.
Add the following code:
{% block header %}
    <!-- Set your background image for this header on the line below. -->
    <header class="intro-header" style="background-image: url({% static 'img/about-bg.jpg' %})">
        <div class="container">
            <div class="row">
                <div class="col-lg-8 col-lg-offset-2 col-md-10 col-md-offset-1">
                    <div class="page-heading">
                        <h1>{% page_attribute "page_title" %}</h1>
                    </div>
                </div>
            </div>
        </div>
    </header>
{% endblock %}
between
{% block title %}
{{ article.title }} - {{ block.super }}
{% endblock %}
and
{% block newsblog_content %}
    {% include "aldryn_newsblog/includes/article.html" with detail_view="true" %}
...
This code is quite similar to the one we inserted into /templates/base.html, just without the placeholder declaration.
Then, replace:
{% load i18n cms_tags apphooks_config_tags %}
with:
{% load i18n staticfiles cms_tags apphooks_config_tags %}
and save.
Tips:
Don't Repeat Yourself (DRY)
There is a concept called DRY in Djangos template languages, to put it simply, do not repeat the same actions over and over.
In this case, we recommend adding the content within <span class="meta"> … </span> into date.html inside templates/aldryn_newsblog/includes/ and replacing the content with {% include "aldryn_newsblog/includes/author.html" %} inside your article_detail.html and article.html files to create one easily maintainable source.
Remember to add {% load apphooks_config_tags %} to the top of the file, or you'll receive an error.
3.Modify article.html
Open article.html inside templates/aldryn_newsblog/includes.
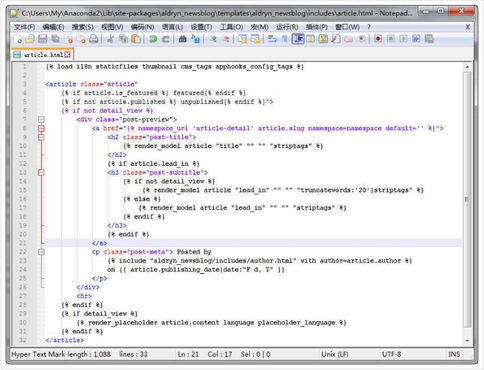
Add {% if not detail_view %} before the:
<div class="post-preview">
and {% endif %} after the:
<hr>
The result should look like:
4.Set Images
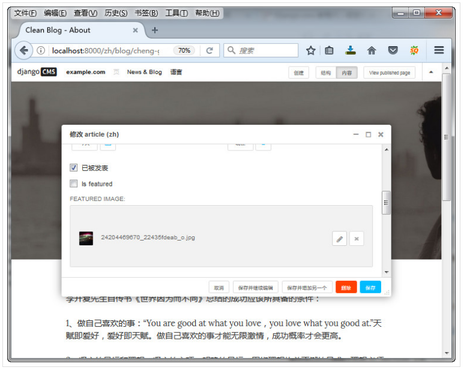
Make sure you've logged in and click on a blog entry in your latest articles under the page where you added the Latest articles plugin.
Next, click News & Blog then Edit this Article in the toolbar that popped out.
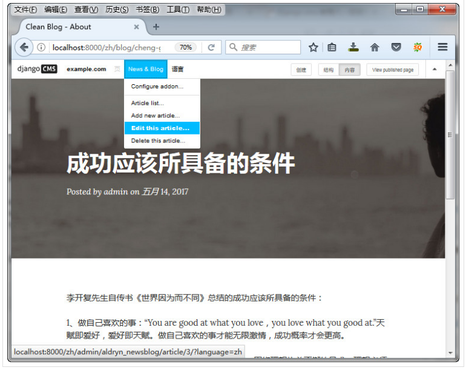
Look for the Featured Image section inside the opened model and click on "Choose File".
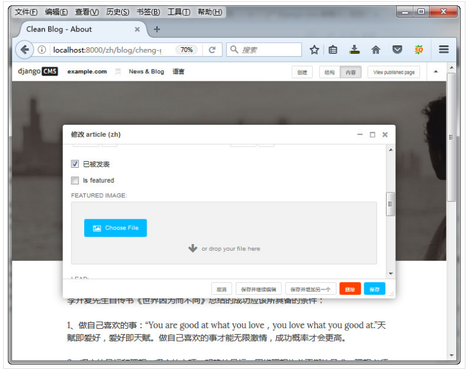
Choose the location you want to save your files first.
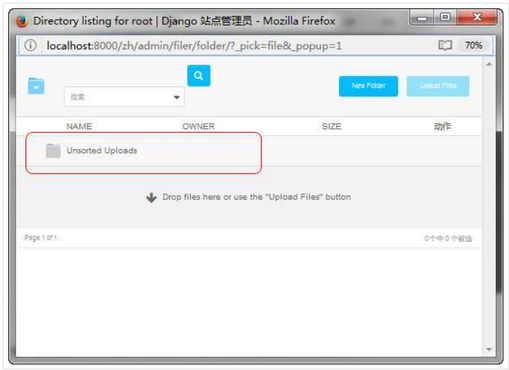
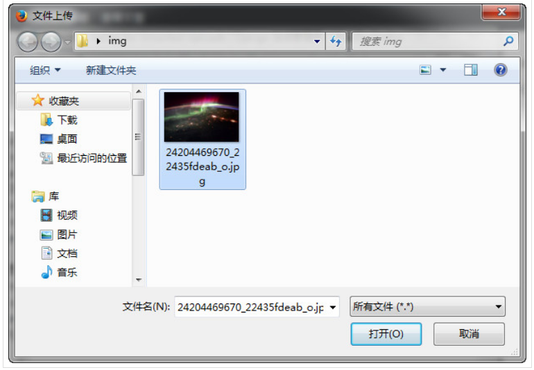
Next, click "Upload Files" and choose the picture you want to upload.
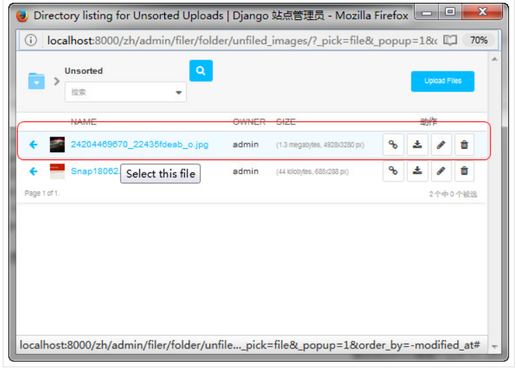
You could see the Thumbnail, once it successfully uploaded.
Then, click and choose this picture.
Click "save" again.
Tips:
When choosing your own Featured image, make sure it has dimensions similar to the header background image, which is about 1200 x 400 pixels
5.Modify article_detail.html
Open article_detail.html inside ...aldryn_newsblogtemplatesaldryn_newsblog, and find the second code:
{% load i18n staticfiles cms_tags apphooks_config_tags %}
replace it with:
{% load i18n staticfiles thumbnail cms_tags apphooks_config_tags %}
Besides, the background image right now is img/about-bg.jpg, we need to adapt it from:
<header class="intro-header" style="background-image: url({% static 'img/about-bg.jpg' %})">
to:
<header class="intro-header" style="background-image: url(
{% if article.featured_image_id %}
    {% thumbnail article.featured_image 1200x400 crop subject_location=article.featured_image.subject_location %}
{% else %}
    {% static 'img/post-bg.jpg' %}
{% endif %}
)">
The code above means: if Featured Image exists, show it with 200 x 400 pixel, while show the default img/post-bg.jpg from the template if it doesn't.
6.Check The Result
Enter a detail article page, you could see those information such as title was displayed on the Featured Image that we've set.

Click here to download a PDF copy of this article
Save it to read later, or share with a colleague


Comment
There is no comment, you can make the first one!